

If you’re looking to monitor the climate in your greenhouse, create a humidor control system, or track temperature and humidity for a weather station project, consider using the AM2320 Temperature & Humidity Sensor.
The AM2320 sensor is pre-calibrated at the factory and does not require many external components to function. With minimal wiring and the right Arduino code, you can quickly begin measuring relative humidity and temperature accurately.
Hardware Overview
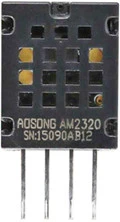
The AM2320 is an affordable and user-friendly digital temperature and humidity sensor manufactured by AOSONG. It shares similarities with the popular DHT11/DHT22 sensors, but unlike them, it features an I2C interface.
The AM2320 sensor can accurately measure humidity in the range of 0% to 100% RH, with a typical accuracy of ±3% within the 20% to 80% RH range (0.024% RH resolution). It also has a temperature range of -40°C to 80°C, with a typical accuracy of ±0.5°C at 25°C (0.01°C resolution).
With a maximum sampling rate of 0.5Hz, the AM2320 can provide data at a rate of one reading every two seconds.
Power Requirement
The sensor operates on a voltage range of 3.3V to 5.5V, making it compatible with both 3V and 5V microcontrollers. Its power consumption is low, consuming less than 0.95mA during measurements and less than 10µA in sleep mode. This makes it suitable for battery-powered devices like handsets, wearables, and smartwatches.
I2C Interface
The AM2320 utilizes the I2C communication protocol, which allows it to use the data and clock lines available on most microcontrollers. It can share these pins with other I2C sensors, as long as there are no address conflicts.
The sensor has a fixed I2C address set to 0x5CHEX. If multiple AM2320 sensors need to be connected to a single bus, a multiplexer/Mux is required for proper communication.
Technical Specifications
Here are the complete specifications:
| Supply Voltage | 3.3V to 5.5V |
| Current draw | ~0.95mA (during measurements) |
| ~10µA (during sleep mode) | |
| Humidity Range | 0 to 100 %RH |
| Humidity Accuracy | ±3% over the range of 20% to 80% RH |
| Temperature Range | -40°C to +80°C |
| Temperature Accuracy | ±0.5°C at 25°C |
| Sampling Rate | 0.5Hz (one reading every two seconds) |
For more details, please refer below datasheet.
AM2320 Sensor Pinout
Let’s examine the pinout of the AM2320 sensor.
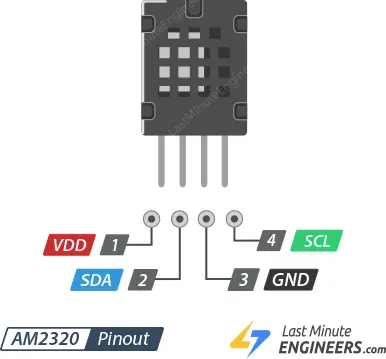
VDD: This is the power pin. The sensor operates on a voltage range of 3.3V to 5.5VDC. Connect it to the same voltage level as your microcontroller’s logic level. For example, if you are using a 5V microcontroller like Arduino, connect VDD to 5V.
SDA: This pin is used for I2C data communication and requires a pull-up resistor of 2.2K to 10K connected to VDD.
GND: This pin is the ground connection for both power and logic signals.
SCL: This pin is used for I2C clock synchronization and requires a pull-up resistor of 2.2K to 10K connected to VDD.
Wiring up a AM2320 to an Arduino
Connecting the AM2320 sensor to an Arduino is straightforward since it utilizes the I2C bus.
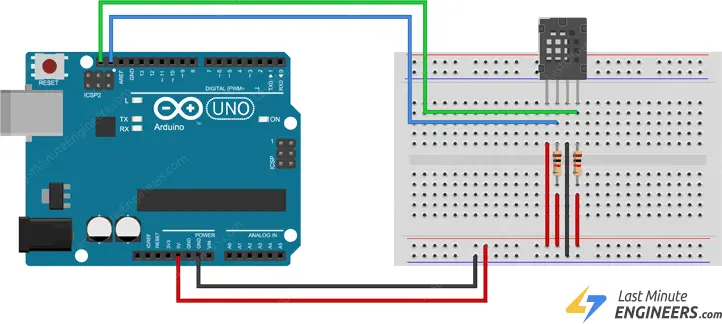
To begin, you only need to connect four pins to use the sensor: VCC, GND, SCL, and SDA.
Connect the SCL pin of the sensor to the I2C clock pin on your Arduino. Similarly, connect the SDA pin of the sensor to the I2C data pin on your Arduino. Please note that the specific pins used for I2C communication may vary depending on the Arduino board you are using. On Arduino boards with the R3 layout, the SCL pin is often labeled as A5, and the SDA pin is labeled as A4, located near the AREF pin.
Since the AM2320 does not have internal pull-up resistors for the I2C bus, you need to add external ones. You can use resistors with values between 2.2K and 10K. Connect one resistor between VDD and the SCL pin, and another resistor between VDD and the SDA pin.
The following diagram illustrates the wiring connections.
Parts Required
| Component Name | Buy Now |
| Arduino Uno REV3 | Amazon |
| AM2320 AM2320B Digital Temperature Humidity Sensor | Amazon |
| Breadboard | Amazon |
| BOJACK 1000 Pcs 25 Values Resistor Kit 1 Ohm-1M Ohm with 5% 1/4W | Amazon |
Installing the Library
To utilize the AM2320 sensor with your Arduino, you must install the Adafruit AM2320 library. You can easily find and install this library through the Arduino Library Manager.
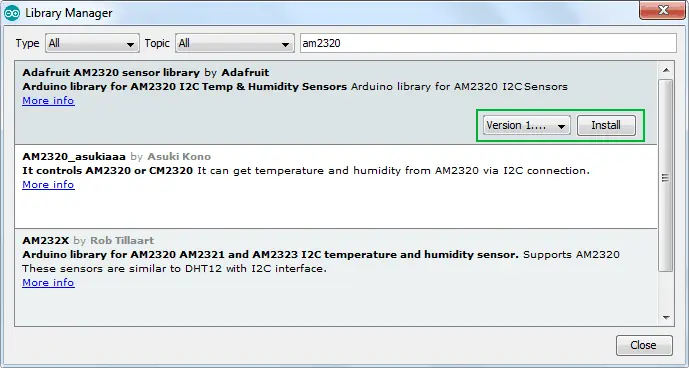
To begin, navigate to “Sketch > Include Library > Manage Libraries…” in the Arduino IDE. Wait for the Library Manager to download the libraries index and update the list of installed libraries.
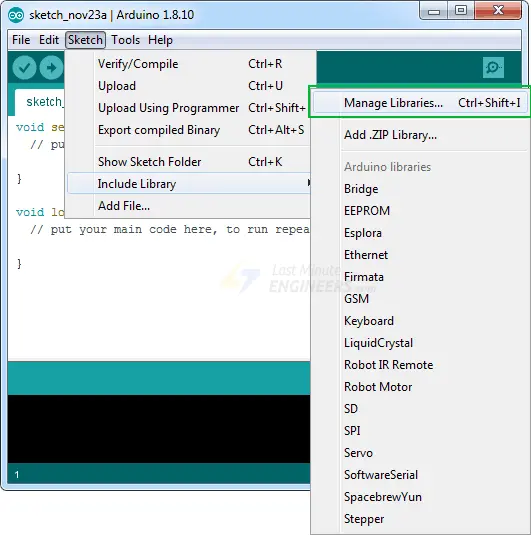
To filter your search, type “am2320” in the search bar and locate the Adafruit AM2320 library. Click on it to install the library.
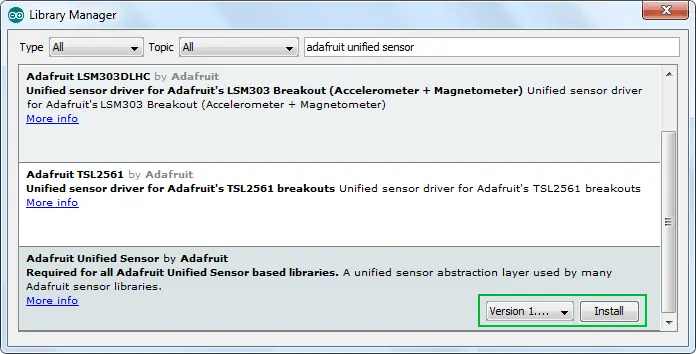
Please note that the Adafruit_AM2320 library relies on the Adafruit Sensor support backend. To ensure compatibility, search for the “Adafruit Unified Sensor” library in the library manager and install it as well. You may need to scroll through the list to find it.
Additionally, you need to install the “Adafruit Bus IO” helper library. This library provides an abstraction layer for I2C and SPI transactions and registers.

By following these steps, you will successfully install the required libraries for the AM2320 sensor.
Arduino Code – Reading Temperature and Humidity
The following is a basic Arduino sketch that allows you to read the temperature and humidity using the AM2320 sensor. Upload this sketch to your Arduino, and you will be able to view the current temperature and humidity in your environment.
#include "Adafruit_Sensor.h"
#include "Adafruit_AM2320.h"

Adafruit_AM2320 am2320 = Adafruit_AM2320();

void setup() {
  Serial.begin(9600);
  while (!Serial) {
    delay(10); // hang out until serial port opens
  }

  am2320.begin();
}

void loop() {
  Serial.print("Temp: ");
  Serial.print(am2320.readTemperature());
  Serial.print(" C");
  Serial.print("\t\t");
  Serial.print("Humidity: ");
  Serial.print(am2320.readHumidity());
  Serial.println(" \%");

  delay(2000);
}
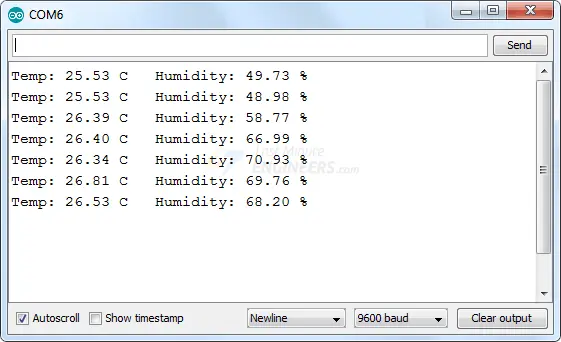
Once the code is uploaded to your Arduino, open the serial terminal in your Arduino IDE with a baud rate of 9600. You should now see the temperature and humidity readings being displayed.
Code Explanation:
The code begins by including the necessary libraries, Adafruit_Sensor.h and Adafruit_AM2320.h, which provide the required functionality for working with the AM2320 sensor. An instance of the Adafruit_AM2320 class is created as an object called “am2320”.
#include "Adafruit_Sensor.h"
#include "Adafruit_AM2320.h"

Adafruit_AM2320 am2320 = Adafruit_AM2320();
In the setup function, the serial communication is initialized at a baud rate of 9600, and the am2320 object is initialized using the begin() function.
void setup() {
  Serial.begin(9600);
  while (!Serial) {
    delay(10); // hang out until serial port opens
  }

  am2320.begin();
}
After the initialization, the loop function is executed repeatedly. Within the loop, the temperature and humidity readings are obtained using the am2320 object’s methods: readTemperature() and readHumidity(). The temperature is printed in Celsius (°C) and the humidity is printed as a percentage (%).
void loop() {
  Serial.print("Temp: ");
  Serial.print(am2320.readTemperature());
  Serial.print(" C");
  Serial.print("\t\t");
  Serial.print("Humidity: ");
  Serial.print(am2320.readHumidity());
  Serial.println(" \%");

  delay(2000);
}
The delay function is used to pause the program for 2 seconds before repeating the loop. This delay ensures that the temperature and humidity readings are displayed every 2 seconds.
Related article
- Arduino DHT11 Sensor Tutorial: How to Interface and Read Data
- Arduino DHT11 and DHT22 Sensor Interface: Step-by-Step Guide
- Arduino BMP180 Guide: Barometric Pressure and Temperature
- Step-by-Step: Interfacing Multiple DS18B20 Sensors with Arduino
- Step-by-Step Guide: LM35 Temperature Sensor Interfacing with Arduino


