

If you have a single ESP32 on your network, you can connect to it using its IP address, like 192.168.1.128. However, if you have several ESP32 devices around your house, keeping track of multiple IP addresses becomes a hassle. This is where mDNS comes in handy.
With mDNS, you can access the web server on your ESP32 using a simple hostname, such as “esp32.local,” instead of an IP address. The best part is that even if the IP address of your ESP32 changes, mDNS automatically maps the new IP address to the same hostname. This allows you to use the same hostname without worrying about IP address changes.
Impressive, right? In this tutorial, you will learn step-by-step how to set up mDNS on an ESP32. But first, let’s explain what mDNS is.
What is mDNS?
Thirty years ago, in the early days of the Internet, visiting a website required knowing its IP address. Computers communicate using numbers, so you needed to type in something like 127.33.54.200. This is cumbersome and not user-friendly.
To solve this, Paul Mockapetris introduced the Domain Name System (DNS) in the early 1980s. DNS maps IP addresses to more memorable domain names, becoming the backbone of the modern internet. When you enter a domain name like google.com into your browser, it queries nameservers for the corresponding DNS records. These records link domain names to IP addresses, making the internet easy to navigate.
DNS is essential for internet browsing, but it isn’t practical for local home networks where devices often have dynamic IP addresses and frequently join or leave the network. Deploying a dedicated server to resolve hostnames in such environments is impractical. This is where Multicast DNS (mDNS) comes in.
mDNS is a decentralized, peer-to-peer protocol designed for small networks. It allows devices to discover each other’s IP addresses by broadcasting their names and IP addresses to all other devices on the network. While this method wouldn’t scale well for the entire internet, it’s effective for small local networks.
Key Features and Benefits of mDNS:
- User-Friendly Hostnames: Devices can be accessed using memorable hostnames like “esp32.local” instead of IP addresses.
- Dynamic IP Handling: mDNS resolves the new IP address with the same hostname even if the IP address changes.
- Zero Configuration: No additional DNS setup is required; mDNS operates independently on local networks.
- Platform Independence: mDNS works across various devices and operating systems, ensuring easy integration.
Now, let’s walk through how to set up mDNS on an ESP32 step by step.
Parts Required
| Component Name | Buy Now |
| ESP32-WROOM-32 Development | Amazon |
Step-by-Step Guide for Setting Up mDNS on an ESP32
Step 1 – Set Up the Arduino IDE
Ensure you have the ESP32 add-on installed in your Arduino IDE before proceeding.
Step 2 – Connect the ESP32 to Your Computer
Use a micro-USB cable to connect your ESP32 board to your computer.
Step 3 – Define Network Credentials
Update the following variables with your WiFi SSID and password before uploading the sketch:
const char* ssid = "YourNetworkName";  // Enter SSID here
const char* password = "YourPassword";  // Enter Password here
Step 4 – Upload the Code
Here’s a simple sketch to set up mDNS on an ESP32. This code connects to a Wi-Fi network, starts an mDNS service, and sets up an HTTP server to serve a basic web page. After uploading, you can access the web server at http://esp32.local/ in your browser.
#include <WiFi.h>
#include <WebServer.h>
#include <ESPmDNS.h>

/* Define your SSID & Password */
const char* ssid = "YourNetworkName";  // Enter SSID here
const char* password = "YourPassword";  // Enter Password here

WebServer server(80);

void setup() {
  Serial.begin(115200);
  delay(100);

  Serial.print("Connecting to ");
  Serial.println(ssid);

  // Connect to your local Wi-Fi network
  WiFi.begin(ssid, password);

  // Check if the ESP32 is connected to the Wi-Fi network
  while (WiFi.status() != WL_CONNECTED) {
    delay(1000);
    Serial.print(".");
  }
  Serial.println("");
  Serial.println("WiFi connected!");

  // Initialize mDNS
  if (!MDNS.begin("esp32")) {   // Set the hostname to "esp32.local"
    Serial.println("Error setting up MDNS responder!");
    while(1) {
      delay(1000);
    }
  }
  Serial.println("mDNS responder started");

  server.on("/", handle_OnConnect);
  server.onNotFound(handle_NotFound);

  server.begin();
  Serial.println("HTTP server started");
}

void loop() {
  server.handleClient();
}

void handle_OnConnect() {
  server.send(200, "text/html", "<!DOCTYPE html><html><head><meta name=\"viewport\" content=\"width=device-width, initial-scale=1.0, user-scalable=no\"></head><body><h1>Hey there!</h1></body></html>");
}

void handle_NotFound(){
  server.send(404, "text/plain", "Not found");
}
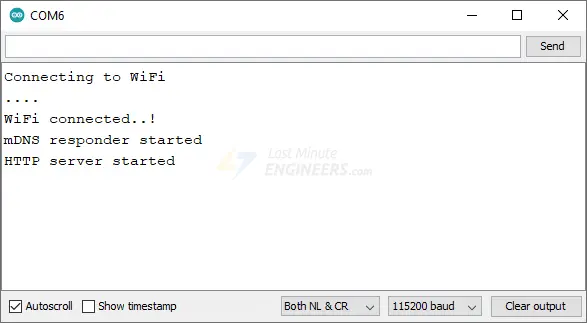
Step 5 – Test the Code
After uploading the code, open the Serial Monitor and set the baud rate to 115200. Press the EN button on the ESP32. It may take a moment to connect to your network, then you should see the messages “mDNS responder started” and “HTTP server started.”
Next, open a web browser and navigate to http://esp32.local/. The ESP32 should display a web page with a greeting message.

Code Explanation
The sketch starts by including three essential libraries: WiFi.h for WiFi connectivity, WebServer.h for creating an HTTP server, and ESPmDNS.h for mDNS services.
#include <WiFi.h>
#include <WebServer.h>
#include <ESPmDNS.h>
Next, two constants, ssid and password, are defined to store your WiFi network’s name and password.
const char* ssid = "YourNetworkName";  // Enter SSID here
const char* password = "YourPassword";  // Enter Password here
A web server object is created to listen on port 80, the default HTTP port.
WebServer server(80);
In the setup() function, serial communication with the PC is initialized.
Serial.begin(115200);
The ESP32 then tries to connect to the WiFi network using WiFi.begin(), which takes the SSID and password as arguments.
WiFi.begin(ssid, password);
The connection status is checked in a loop until the ESP32 successfully connects to the network.
while (WiFi.status() != WL_CONNECTED) {
  delay(1000);
  Serial.print(".");
}
Next, the mDNS service is started by calling the begin() method on the MDNS object, an instance of the MDNSResponder class. The desired hostname is passed as an argument.
if (!MDNS.begin("esp32")) {   // Set the hostname to "esp32.local"
  Serial.println("Error setting up MDNS responder!");
  while(1) {
    delay(1000);
  }
}
Handlers for the root URL and for 404 errors are set up. When someone accesses the root URL, handle_OnConnect() is called. If a requested URL is not found, handle_NotFound() is called.
server.on("/", handle_OnConnect);
server.onNotFound(handle_NotFound);
The server is started by calling the begin() method on the server object.
server.begin();
The loop() function continuously checks for incoming client requests and processes them using the handleClient() method.
void loop() {
  server.handleClient();
}
The handle_OnConnect() function sends an HTML response when the root URL (“/”) is accessed. It returns a simple HTML page with a greeting message using the server.send() method.
void handle_OnConnect() {
  server.send(200, "text/html", "<!DOCTYPE html><html><head><meta name=\"viewport\" content=\"width=device-width, initial-scale=1.0, user-scalable=no\"></head><body><h1>Hey there!</h1></body></html>");
}
If a request is made for a URL that does not exist, the handle_NotFound() function sends a 404 Not Found response.
void handle_NotFound(){
  server.send(404, "text/plain", "Not found");
}
Related article
- How to Assign a Fixed IP Address to Your ESP32 Device
- ESP32 vs. ESP8266: Which Microcontroller Fits Your Requirements?
- Firebase Authentication with ESP32/ESP8266: Email and Password Guide
- Node-RED & MQTT with ESP8266: Easy Publish and Subscribe Tutorial


