
The ESP family of microcontrollers is commonly linked with WiFi, and this association is logical given their reputation as the preferred choice for swiftly and effortlessly connecting projects to the internet. Despite the spotlight being on WiFi functionality, it’s important to note that the ESP32 also comes equipped with Bluetooth. However, Bluetooth usage on the ESP32 is not as prevalent, even though it is a feature available. If you wish to explore Bluetooth capabilities on the ESP32, this tutorial serves as an excellent starting guide.
Regarding ESP32 Bluetooth
The ESP32 is equipped with dual-mode Bluetooth, supporting both Bluetooth Classic and Bluetooth Low Energy (BLE). Despite sharing certain fundamental aspects such as architecture and operating in the 2.4 GHz ISM (Industrial, Scientific, and Medical) band, these two protocols differ significantly.
Bluetooth Classic
Bluetooth Classic, known for its use in connecting smartphones to wireless earbuds, is the original Bluetooth technology. If you’ve ever utilized Bluetooth-to-Serial-Bridge modules like the HC-05 or HC-06 with an Arduino, you’ve inadvertently employed Bluetooth Classic.
Designed for continuous two-way data transfer with high application throughput (up to 3 Mbps), Bluetooth Classic is effective but limited to short distances. Operating over 79 channels in the 2.4 GHz ISM band, it is commonly employed in projects requiring continuous data streaming, such as audio streaming or file transfer.
This tutorial provides guidance on utilizing Bluetooth Classic on the ESP32.
Bluetooth Low Energy (BLE)
Bluetooth LE, initially marketed as Bluetooth Smart and commonly referred to as BLE, prioritizes very low power operation while maintaining a comparable communication range. However, BLE is more than just a low-power version of Bluetooth Classic. Operating in the same radio spectrum range but utilizing a different set of 40 channels at a lower data rate (up to 1 Mbps), BLE is well-suited for IoT projects where power consumption is a primary concern, such as projects requiring periodic device wake-up, sensor data gathering, Bluetooth transmission, and return to sleep mode.
As using ESP32 BLE is somewhat more intricate than using Bluetooth Classic, we’ve covered it in a separate tutorial.
Bluetooth Classic vs. BLE
While BLE is primarily utilized to conserve power, there are several crucial differences.
Power Consumption: Bluetooth Classic typically consumes more power (around 1 W), while BLE is designed for low power consumption (typically between 0.01 and 0.5 W), making it suitable for battery-powered devices requiring extended operation.
Data Transfer Rates: Bluetooth Classic provides higher data rates than BLE, making it suitable for projects requiring continuous and high-speed data transmission, while BLE is optimized for short bursts of data transmission.
Range: Both BLE and Classic can cover up to 100 meters, with the exact distance varying based on the environment and implementation.
Latency: Bluetooth Classic connections have a latency of up to 100 ms, while BLE connections have a latency of 6 ms, with lower values considered better.
Compatibility: Bluetooth Classic is more prevalent in older devices, while BLE is commonly used in modern smartphones and other gadgets.
Refer to the table below for a detailed comparison between BLE and Bluetooth Classic.
| Bluetooth Classic | Bluetooth Low Energy (BLE) | |
| Data Rate | 1 Mbps for BR2-3 Mbps for EDR | 500 kbps – 1 Mbps |
| Frequency Band | 2.4 GHz ISM band | 2.4 GHz ISM band |
| Number of Channels | 79 Channels with 1 MHz spacing | 40 Channels with 2 MHz spacing |
| Communication Range | 8 m up to 100 m | 8 m up to 100 m |
| Power Consumption | High (up to 1 W) | Low (0.01 W up to 0.5 W) |
| Device Pairing is Mandatory? | YES | NOT Mandatory |
| Supported Topologies | Point-to-Point (1:1) | Point-to-Point (1:1)Broadcast (1:many)Mesh (many:many) |
| Modulation Technique | GFSKπ/4 DQPSK8 DPSK | GFSK |
| Latency | 35ms | 2-16ms (Avg. 9ms) |
ESP32 Bluetooth Protocol Stack
Before we move forward, it’s essential to comprehend the Bluetooth protocol stack, as it sheds light on the reasoning behind incorporating specific functions into our code.
In essence, the Bluetooth protocol stack is divided into two components: a “host stack” and a “controller stack.”
The host serves as the main CPU responsible for executing a Bluetooth stack. ESP-IDF currently supports two host stacks. The default BLUEDROID-based stack accommodates both Bluetooth Classic and BLE. Conversely, the Apache NimBLE-based stack is exclusively designed for BLE.
The controller stack manages the Bluetooth radio, essentially operating as a data pipeline: serial data received is transmitted through the Bluetooth connection, and data incoming from the Bluetooth side is forwarded to the host.
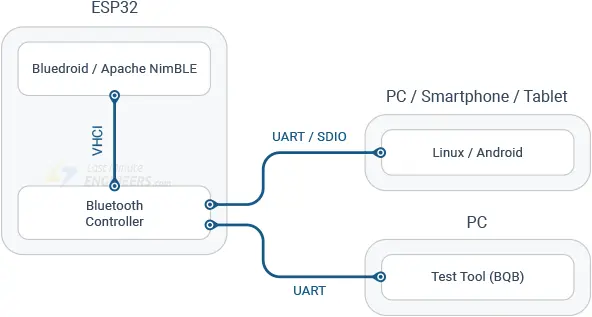
The VHCI interface (software-implemented virtual HCI interface) plays a pivotal role in facilitating communication between the host and the controller.
For more in-depth information, you can consult Espressif’s Bluetooth architecture description.
Bluetooth Serial Sketch
Now, we’ll create the code for the ESP32 to establish communication with our smartphone and enable data exchange.
To program the ESP32, we’ll use the Arduino IDE, so make sure you have the ESP32 add-on installed before proceeding:
- Open your Arduino IDE.
- Go to File > Examples > BluetoothSerial > SerialtoSerialBT.
- The relevant code should load.
#include "BluetoothSerial.h"

#if !defined(CONFIG_BT_ENABLED) || !defined(CONFIG_BLUEDROID_ENABLED)
#error Bluetooth is not enabled! Please run `make menuconfig` to and enable it
#endif

#if !defined(CONFIG_BT_SPP_ENABLED)
#error Serial Bluetooth not available or not enabled. It is only available for the ESP32 chip.
#endif

BluetoothSerial SerialBT;

void setup() {
  Serial.begin(115200);
  SerialBT.begin("ESP32test"); //Bluetooth device name
  Serial.println("The device started, now you can pair it with bluetooth!");
}

void loop() {
  if (Serial.available()) {
    SerialBT.write(Serial.read());
  }
  if (SerialBT.available()) {
    Serial.write(SerialBT.read());
  }
  delay(20);
}
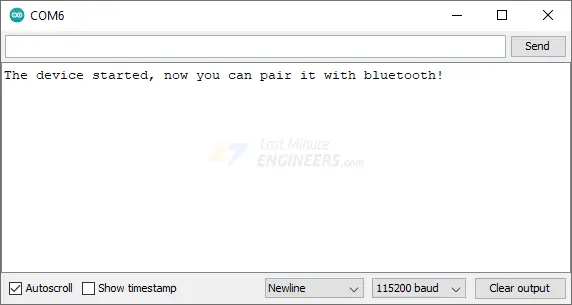
Once you have uploaded the sketch, open the serial monitor at baud rate 115200. You should see a message saying: “The device started, now you can pair it with bluetooth!”.

Code Explanation
This code establishes bidirectional serial Bluetooth communication between two devices. The code begins by including the BluetoothSerial.h library, which provides the necessary functionalities for serial operations over Bluetooth.
#include "BluetoothSerial.h"
The following code checks if Bluetooth is properly enabled.
#if !defined(CONFIG_BT_ENABLED) || !defined(CONFIG_BLUEDROID_ENABLED)
#error Bluetooth is not enabled! Please run `make menuconfig` and enable it
#endif

#if !defined(CONFIG_BT_SPP_ENABLED)
#error Serial Bluetooth not available or not enabled. It is only available for the ESP32 chip.
#endif
Next, an object of the BluetoothSerial class, named SerialBT, is created. This initializes the Bluetooth stack on the ESP32 and handles the transmission and reception of data. The implementation file for this class can be found here. Internally, this class uses IDF’s Bluetooth Classic API.
BluetoothSerial SerialBT;
In the setup, serial communication is established at a baud rate of 115200.
Serial.begin(115200);
Following that, the begin() method of the BluetoothSerial object is called, taking care of the lower-level initialization of the Bluetooth stack. This method accepts a string input containing the desired Bluetooth device name. This name is visible to other Bluetooth-enabled devices during their discovery process. By default, it’s called ESP32test, but you can rename it and give it a unique name.
Note that this method returns a Boolean value, indicating whether the initialization succeeded or not. For a robust code, you should always include error checks.
SerialBT.begin("ESP32test"); //Bluetooth device name
The loop section allows bidirectional data transfer between the Serial Monitor and the ESP32 Bluetooth serial.
The first if statement checks if there is any data available on the standard serial port (like when you send data from a serial monitor on a PC). If data is available, it is read using Serial.read() and sent over the Bluetooth serial connection using SerialBT.write(). So, any data you send from your computer via the serial port is forwarded to the connected Bluetooth device.
if (Serial.available()) {
  SerialBT.write(Serial.read());
}
The next if statement checks if there’s any data available from the Bluetooth serial connection (like when a paired Bluetooth device sends some data). If data is available, it is read using SerialBT.read() and sent to the Serial Monitor using Serial.write(). So, any data received from the Bluetooth device is forwarded to your Serial Monitor.
if (SerialBT.available()) {
  Serial.write(SerialBT.read());
}
Connecting to the Android Phone
Let’s initiate a connection between the ESP32 and an Android phone wirelessly. The process may vary slightly depending on the device, but the general steps are quite similar.
1. Ensure that the ESP32 is powered up and ready to establish a connection.
2. Swipe down from the top of your Android phone’s screen and confirm that Bluetooth is turned on.
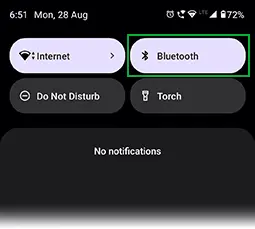
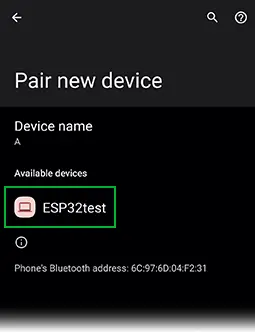
3. Touch and hold the Bluetooth icon, then tap “Pair new device” and wait a few seconds.
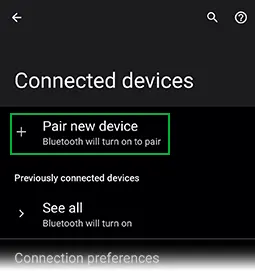
4. Tap the name of the Bluetooth device you want to pair with your device (in our case, ESP32test). Follow any on-screen instructions.
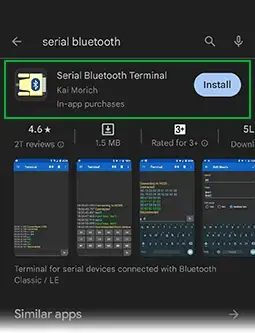
5. For the next steps in this tutorial, you need a Bluetooth Terminal application installed on your smartphone. We recommend using the Android app “Serial Bluetooth Terminal,” available in the Play Store.
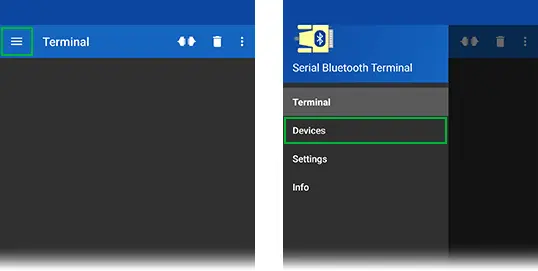
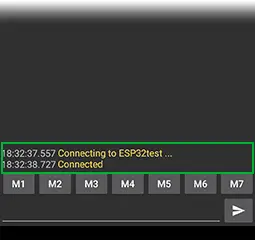
6. After installing, launch the “Serial Bluetooth Terminal” app. Click on the icon in the top left corner and choose “Devices.”
7. You should see a list of devices you’ve previously paired with. Select “ESP32test” from this list.
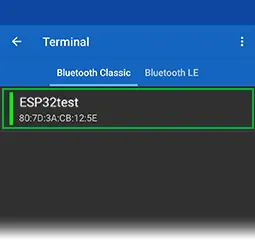
8. You should get a “Connected” message. That’s it! Your smartphone is now successfully paired with the ESP32 and ready to communicate.
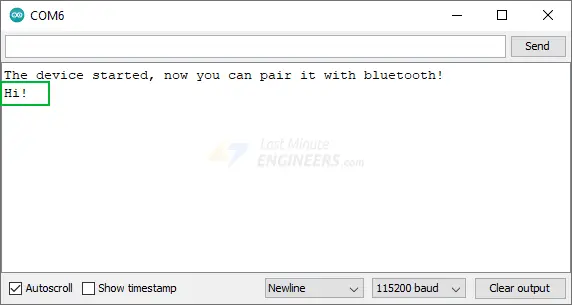
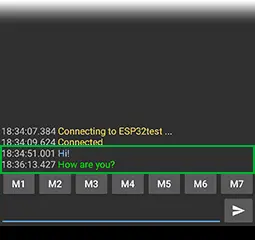
9. Now, type something in the input box located at the bottom of the app, for example, “Hi!”
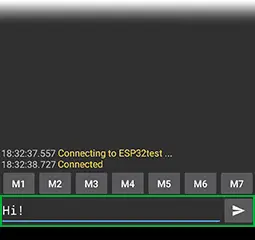
10. You should instantly receive that message in the Arduino IDE Serial Monitor.
11. You can also exchange data between your Serial Monitor and your smartphone. Type something in the Serial Monitor’s top input box and press the “Send” button.
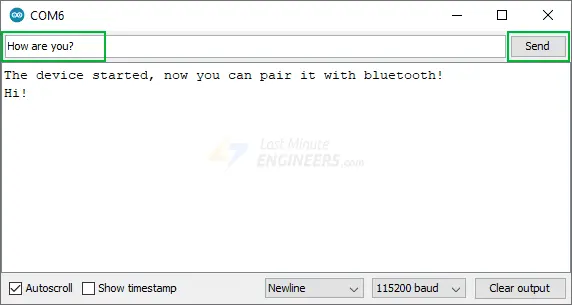
12. You should instantly receive that message in the Serial Bluetooth Terminal App.
ESP32 Project: Bluetooth-Controlled Relay
Let’s create a simple project that lets you control relays wirelessly using Bluetooth. This can be useful for home automation, smart lighting, security systems, and other similar applications.
Wiring
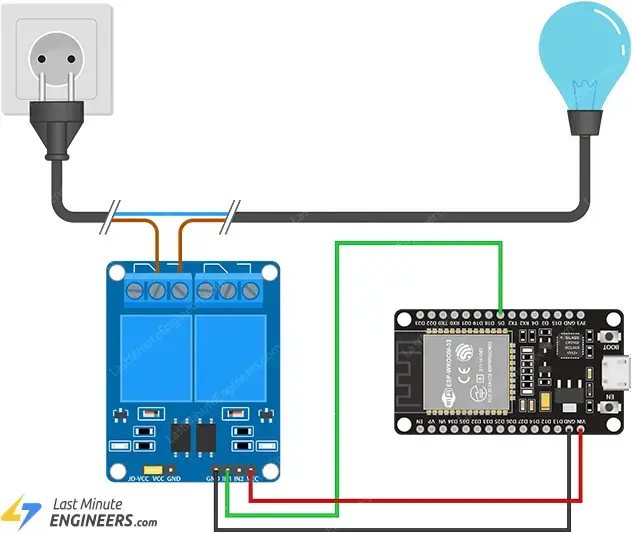
Connect the relay module to the ESP32 as depicted in the following diagram. The diagram shows the wiring for a 2-channel relay module; wiring for a different number of channels is similar.
Parts Required
ESP32 Code
Once you are done with the wiring, try the below sketch.
#include "BluetoothSerial.h"

#if !defined(CONFIG_BT_ENABLED) || !defined(CONFIG_BLUEDROID_ENABLED)
#error Bluetooth is not enabled! Please run `make menuconfig` to and enable it
#endif

#if !defined(CONFIG_BT_SPP_ENABLED)
#error Serial Bluetooth not available or not enabled. It is only available for the ESP32 chip.
#endif

// GPIO where relay is connected to
const int relayPin =  5;

// Handle received messages
String message = "";

// Create BluetoothSerial object
BluetoothSerial SerialBT;

void setup() {
  // Begin serial communication with Arduino and Arduino IDE (Serial Monitor)
  Serial.begin(115200);

  // Initialize relayPin as an output
  pinMode(relayPin, OUTPUT);
  digitalWrite(relayPin, HIGH);

  // Initialize the Bluetooth stack
  SerialBT.begin("ESP32test"); //Bluetooth device name
  Serial.println("The device started, now you can pair it with bluetooth!");
}

void loop() {
  if (SerialBT.available()){
    char incomingChar = SerialBT.read();
    if (incomingChar != '\n'){
      message += String(incomingChar);
    }
    else{
      message = "";
    }
    Serial.write(incomingChar);
  }
  // Check received message and control output accordingly
  if (message == "on"){
    digitalWrite(relayPin, LOW);
  }
  else if (message == "off"){
    digitalWrite(relayPin, HIGH);
  }
  delay(20);
}
Testing the Code
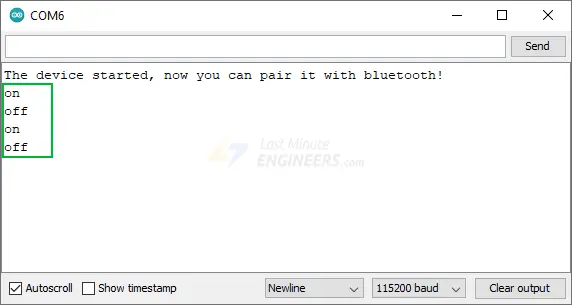
Once you have uploaded the sketch, open the serial monitor at baud rate 115200 and press the EN button. You should see a message saying: “The device started, now you can pair it with bluetooth!”.
Launch the Serial Bluetooth Terminal app and connect to your ESP32.
Now, as you type “on” in the input box at the bottom of the app, the relay should activate instantly. Likewise, typing “off” will deactivate the relay immediately.
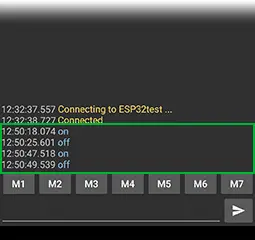
Additionally, you will receive these messages in the Arduino IDE Serial Monitor for monitoring purposes.
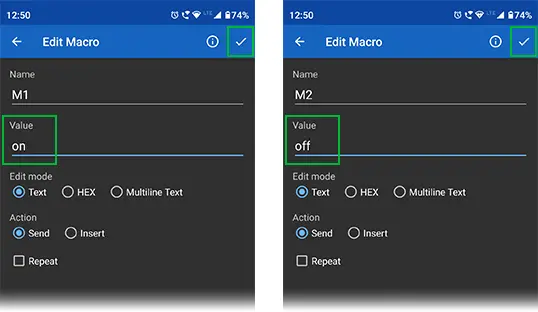
The app offers several macros that you can customize to save default messages. For instance, you can associate M1 with the “on” message and M2 with the “off” message. This way, you can easily control the relay using the predefined macros, adding an extra layer of convenience to your project.
Related article
- Effortless LED Control: ESP32 and WLED Setup Tips
- ESP32 Web Server Tutorial: PWM LED Brightness Control Slider
- ESP32 Capacitive Touch Pins: Basics for Interactive Projects
- Essential ESP32 ADC Basics: Analog-to-Digital Converter Explained


