
Whether referred to as individually addressable RGB LEDs, WS2812B, or NeoPixels, their widespread popularity is undeniable, making them a essential component for any illuminated and dynamic project.
Programming code for the manipulation of addressable LEDs is not a complex task. However, what if your goal is to incorporate ambient lighting into your living space or office, all easily managed from your smartphone? Currently, the undisputed best choice is WLED—an exceptional, free, feature-packed, open-source mobile application that grants full control over a diverse range of RGB LEDs.
The WLED application streamlines the process of managing individually addressable LEDs, making it more straightforward, convenient, and, most importantly, enjoyable. This app is simply too impressive to pass up.
In this guide, we will delve into the steps for installing WLED on an ESP32 board and utilizing it to command a series of addressable LEDs.
Parts Required
Installing WLED on an ESP32 Board
The process of installing this custom firmware on an ESP32 Board with WLED is remarkably straightforward. By connecting the ESP32 to your computer and following a few simple steps, the installer takes care of the rest.
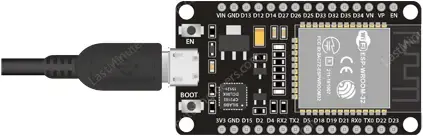
Step 1: Connect your ESP32 board to your computer using a USB cable, ensuring that the cable supports data transfer.
Step 2: Open a web browser and go to install.wled.me. This URL will direct you to the website displayed below.
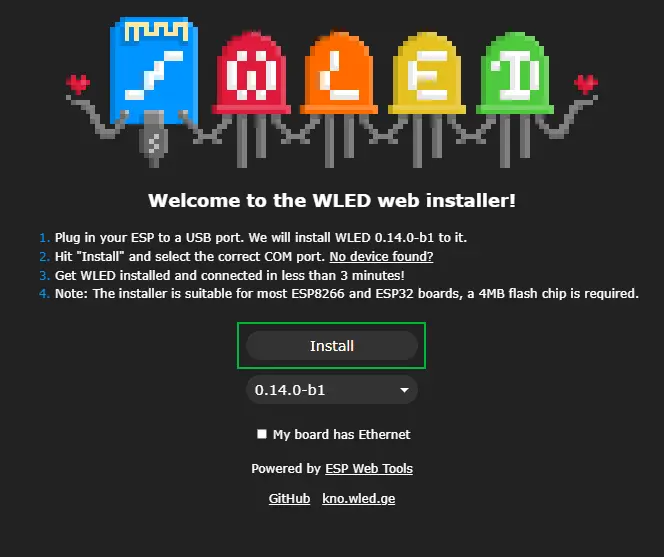
Step 3: Click on Install.
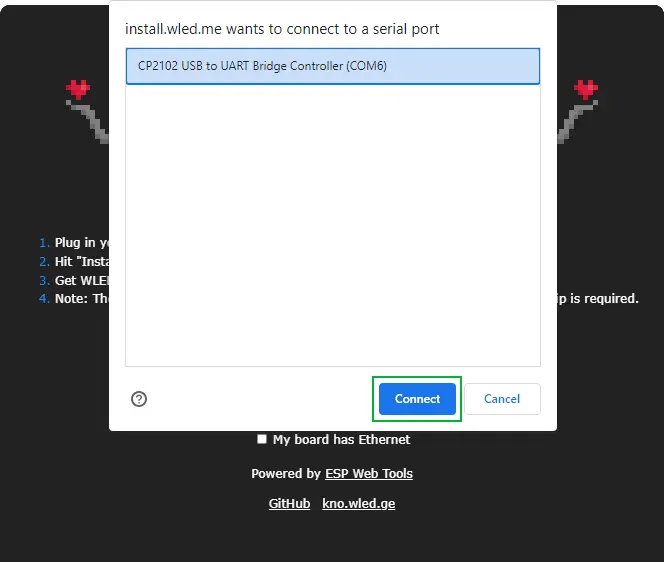
Step 4: Choose the COM port to which your ESP32 is connected and click Connect. WLED utilizes the Web Serial API to open serial ports on your computer. If nothing appears, consider updating your USB-to-serial drivers or using a USB cable that supports data transfer.
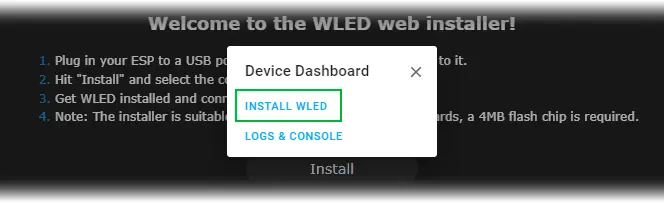
Step 5: Click ‘Install WLED’ to initiate the process.
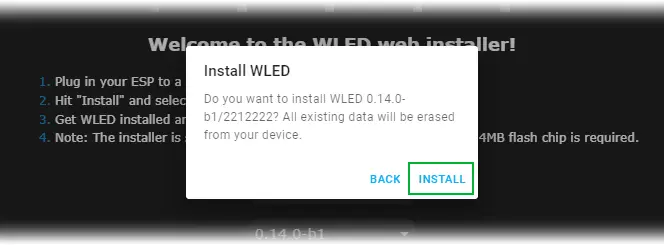
Step 6: Confirm the installation to flash the firmware onto the board. This step serves as a final warning, as all data on the device will be erased.
Note that some ESP32 boards may require pressing the BOOT button before selecting the final install button.
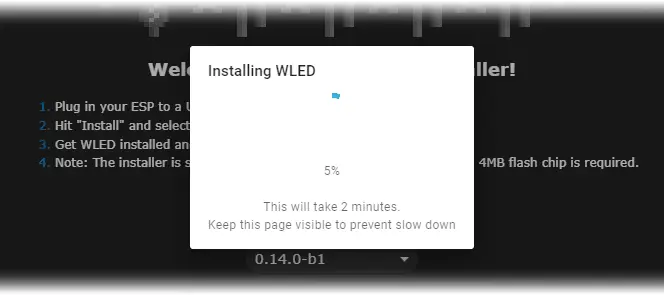
Step 7: The installation process should commence. You can release the BOOT button now that the connection has been established. Installation typically takes only a few minutes.
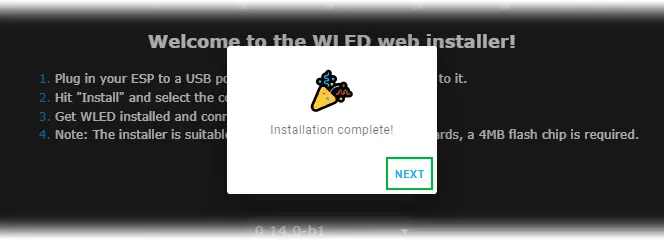
Step 8: Click Next to finalize the installation.
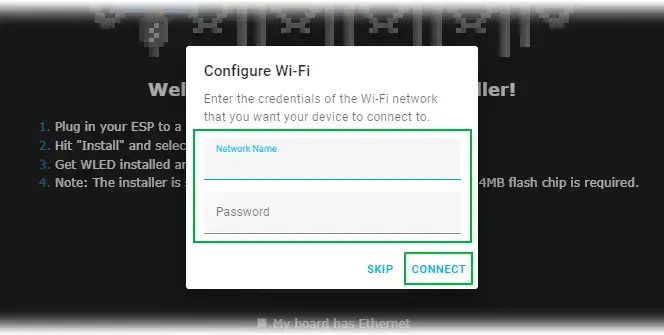
Step 9: Enter your Wi-Fi credentials and click Connect. This action will link your ESP32 to your Wi-Fi network and store the details for future use.
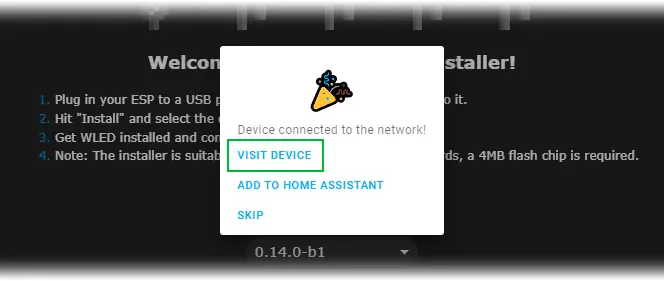
Step 10: Look for the message “Device connected to the network!” and click Visit Device to access the WLED User Interface (UI).
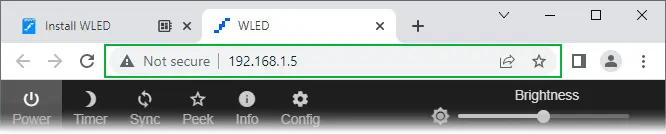
Step 11: Take note of the URL, as it will be necessary to access the WLED UI later on.
A Quick Tour of the WLED UI
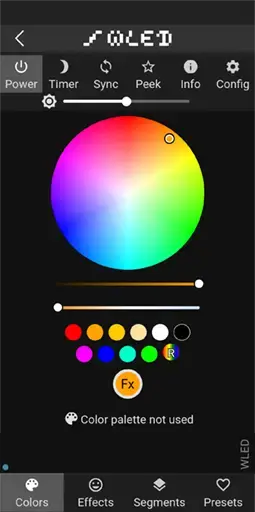
WLED’s UI is straightforward but might seem a bit overwhelming initially. The UI is organized into five distinct sections:

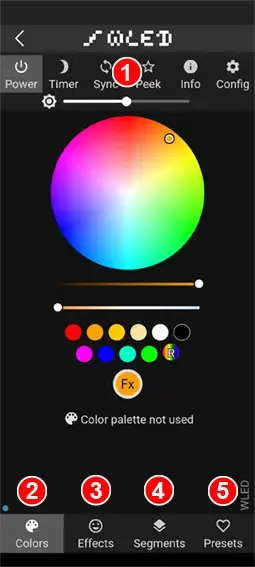
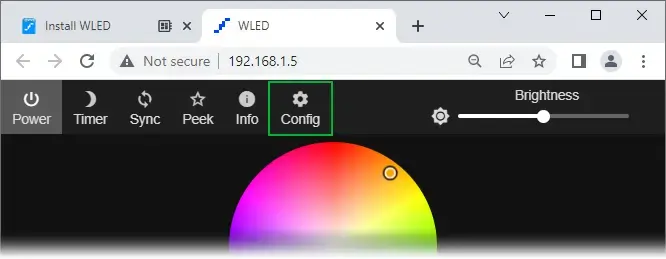
Step 1: Configuration
In this section, you’ll find buttons like Power (for turning the lights on or off), Timer (for scheduling lights to activate and deactivate at specific times), Sync (for synchronizing multiple WLED devices across your network), Peek (for previewing animations of your lights), Config (for setting the number of LEDs and the GPIO port), and a Brightness slider (for controlling overall brightness).
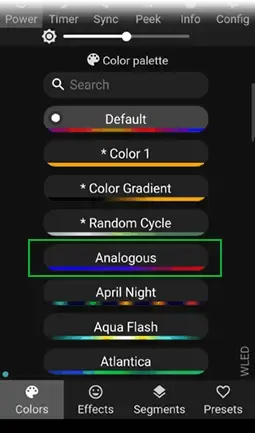
Step 2: Color Picker
This segment allows you to modify the color of the LEDs, whether they are in a static or animated state. Scrolling down provides access to various color palettes for use in effects.
Step 3: Effects/Animation
This area houses a library of pre-designed animations for your lights. While each effect comes with its color scheme, you can easily customize it using the Color Picker section.
Step 4: Segment
If you have a large array or matrix of LEDs, you can divide them into segments and assign a different color, animation, or color scheme to each segment.
Step 5: Presets
In this section, you can create presets for your personalized light show and build a playlist to cycle through the numerous available animations.
Configuring the WLED
Changing the URL
Once the setup is complete, it’s advisable to navigate to the WiFi Setup screen and modify the address to something memorable, facilitating easy access to the interface later on.
Step 1: Click on Config.
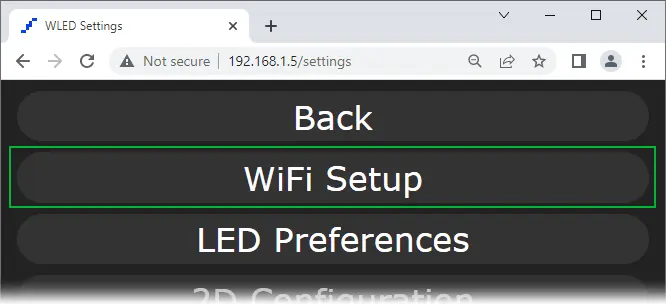
Step 2: Select WiFi Setup.
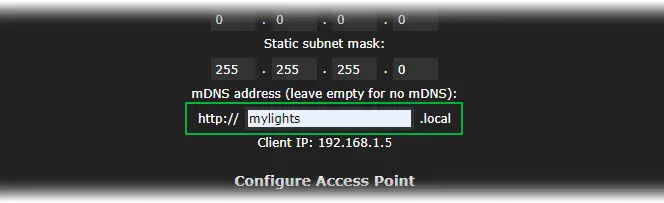
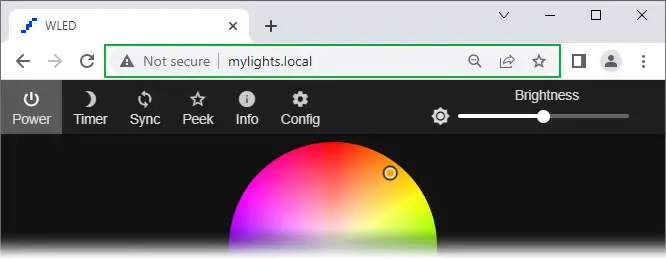
Step 3: Scroll down to the mDNS address and set it to your preference. I opted for http://mylights.local/ – henceforth, this is the URL I’ll use in a web browser on my WiFi network to connect to my lights.
Step 4: Scroll to the top or bottom of the page and click Save & Connect.
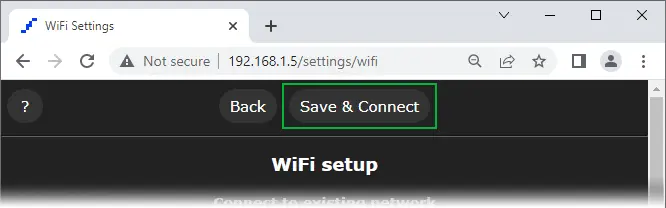
Step 5: Look for the message ‘WiFi settings saved.’
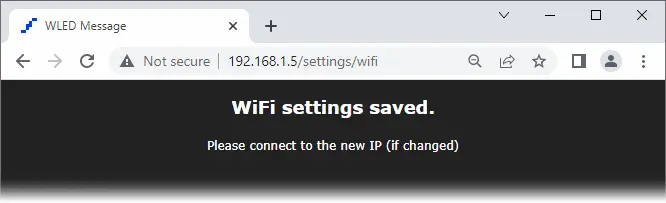
Step 6: Proceed to connect to the new IP address now.
Configuring LED lights
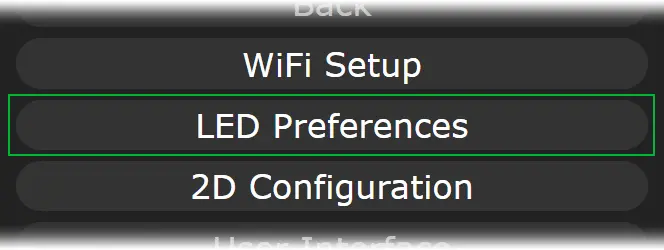
Step 1: Click on Config and select LED Preferences.
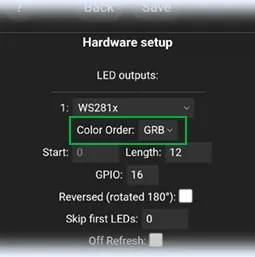
Step 2: Scroll down to Hardware Setup and select the type of led strip you have.

Step 3: Set the “Length” to match the number of LEDs. We have a total of 12 LEDs, so I changed the length to 12.

Step 4: Make a note of the GPIO pin number. This pin will be used to send data to the LEDs. By default, GPIO16 is used.

Step 5: Scroll down to the bottom and click Save.
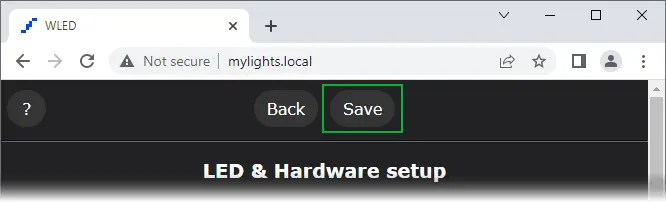
Step 6: Click Back to return to the main screen.
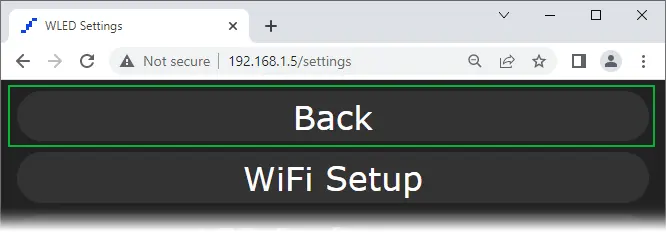
Connecting a WS2812x Addressable LED Strip to an ESP32
After completing the WLED configuration, disconnect the ESP32 from the USB port. Now, let’s establish the connection between an addressable LED strip and the ESP32.
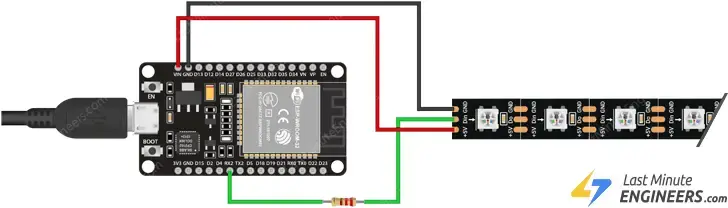
The wiring process is relatively straightforward, involving three wires: two for power and one for data transmission.
Connect the Red wire (+5V/VCC) from the addressable LED strip to the ESP32’s VIN pin, and attach the White/Yellow wire (GND) to the ESP32’s GND pin.
Lastly, link the Green wire (DIN) from the LED strip to the ESP32’s GPIO16 (RX2), using a 330 Ohm resistor for protection on the data pin. Ideally, position the resistor as close to your addressable LEDs as possible. A resistor ranging between 220 and 470 Ohms should work effectively.
For smaller LED configurations, you can plug the ESP32 into your computer using a USB cable and power the strip directly through the board.
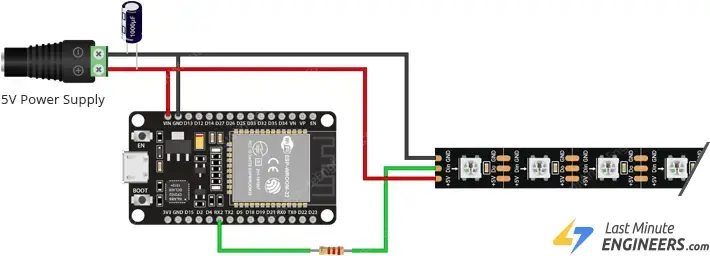
However, for larger projects requiring more LEDs, USB power may not suffice. In such cases, it’s advisable to inject power into the strip from an external source. Bear in mind that each RGB LED consumes approximately 60mA (20mA per color channel) when set to full brightness. This means that for every 30 LEDs, your LED strip could draw up to 1.8 Amps.
Once the wiring is complete, the LEDs should illuminate, emitting a soft yellow light. If this isn’t the case, double-check your wiring before proceeding.
From this point onward, you can manage everything through the WLED App.
Using the WLED Mobile App
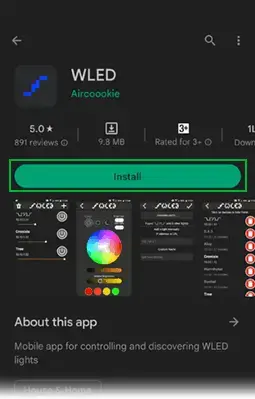
Step 1: Download the WLED app from the Google Play Store or the Apple App Store on your smartphone or tablet.
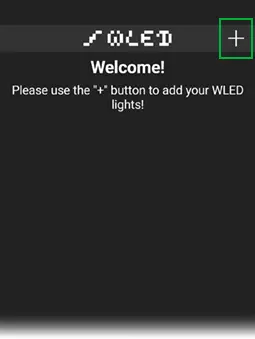
Step 2: Open the app and tap on the plus icon in the upper right corner to access the discovery page.
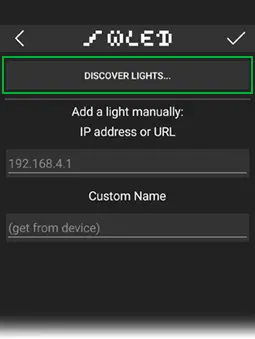
Step 3: Press “Discover Lights.” This action will scan your WIFI for all connected boards running WLED software.
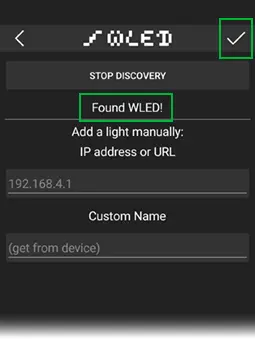
Step 4: Once it indicates “Found WLED!” click the Tick icon in the upper-right corner. This action will take you back to the home page, displaying a list of all WLED devices on your network.
Step 5: Tap on the recently discovered device to open the control panel.
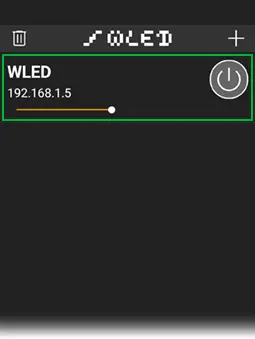
Step 6: Choose a color using the color wheel. And there you have it, fully operational, remotely controlled addressable LEDs!
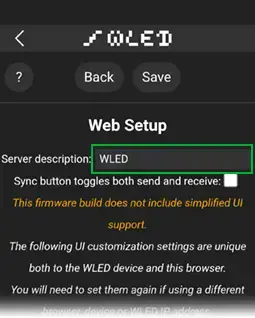
Step 7: For users with multiple WLED devices, consider changing the displayed name on the app for differentiation. Go to Config > User Interface, name it as desired, and then save the changes.
Changing Effects
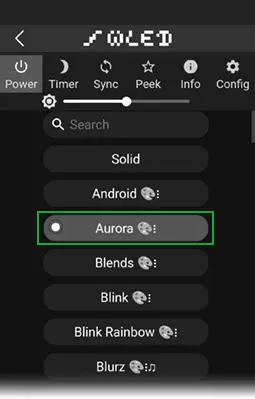
WLED provides access to more than 180 distinct effects, marking the onset of genuine enjoyment.
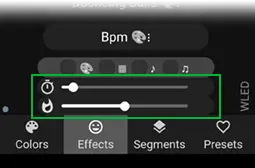
Step 1: Head to the Effects tab and pick an effect. The LEDs will promptly react.
Step 2: Adjust the speed and intensity of the effect. Shifting the slider further results in a quicker and more pronounced impact.
Step 3: Every effect comes with its unique color scheme, easily modifiable in the Color Picker section. This allows you to retain the animation effect while altering the colors.
Tips and Recommendations
When configuring your setup with ESP32, consider the following tips and recommendations:
- ESP32 can manage up to ten strips simultaneously.
- While most strip types are yet to be fully tested, the following are confirmed to work: WS281x, SK6812 RGBW, PWM white.
- After completing the installation, visit the LED settings page to specify the LED type, pin numbers, length, and color order for your LED strips.
- To significantly increase the framerate, choose an appropriate power supply for the setup and disable the WLED brightness limiter setting.
- There are no restrictions on pins; feel free to use any available pin.
- Performance is determined by the number of LEDs being driven with the ESP32 and the quantity of ESP32 output pins in use.
- For optimal performance, it is recommended to use 512 LEDs/pin with 4 outputs, totaling 2048 LEDs.
- For excellent performance, consider using 800 LEDs/pin with 4 outputs, resulting in a total of 3200 LEDs.
- Good performance can be achieved with 1000 LEDs/pin and 4 outputs, totaling 4000 LEDs.
- Marginal performance can be expected with 1000 LEDs/pin and 5 outputs, reaching a total of 5000 LEDs.
- Marginal performance is also possible with 800 LEDs/pin and 6 outputs, totaling 4800 LEDs.
- The ESP32 is capable of calculating approximately 65k-85k LEDs per second, translating to 1000 LEDs at around 70fps, 2000 LEDs at about 35fps, and 4000 LEDs at approximately 18fps.
Related article
- ESP32 Web Server Tutorial: PWM LED Brightness Control Slider
- Step-by-Step Tutorial: Setting Up ESP32 Board in Arduino IDE
- ESP32 Capacitive Touch Pins: Basics for Interactive Projects
- Essential ESP32 ADC Basics: Analog-to-Digital Converter Explained


